Appearance
Last review: Sept 15,2025
Disclaimer
This article describes my personal understanding of how to build a loader for a Windows executable. Although I will sometimes provide code as examples, this article is more of an explanation of the fundamental principles rather than a complete tutorial on creating a PE loader. If you are interested in finding code, I recommend the project libpeconv by hasherezade, which is the most complete loader I have found so far.
Portable Executable
For Windows operating systems, an executable is a file that follows the so-called Portable Executable (PE) format. Basically, this format begins with a series of headers followed by a series of sections. While the sections contain code and data, the headers provide information on how to load the PE file into memory to make it work properly. As PE loader developers, we will spend a lot of our time parsing these headers.
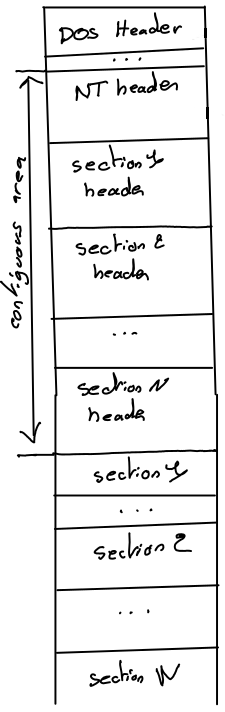
There are three kinds of headers:
- The DOS header (one per PE file)
- The NT header (one per PE file), which is split into a file header and an optional header
- The section headers (one for each section)
What makes the PE format difficult to understand is the nested C/C++ structures used to describe it. The following pictures show some deeper structures that we will explain in future sections.
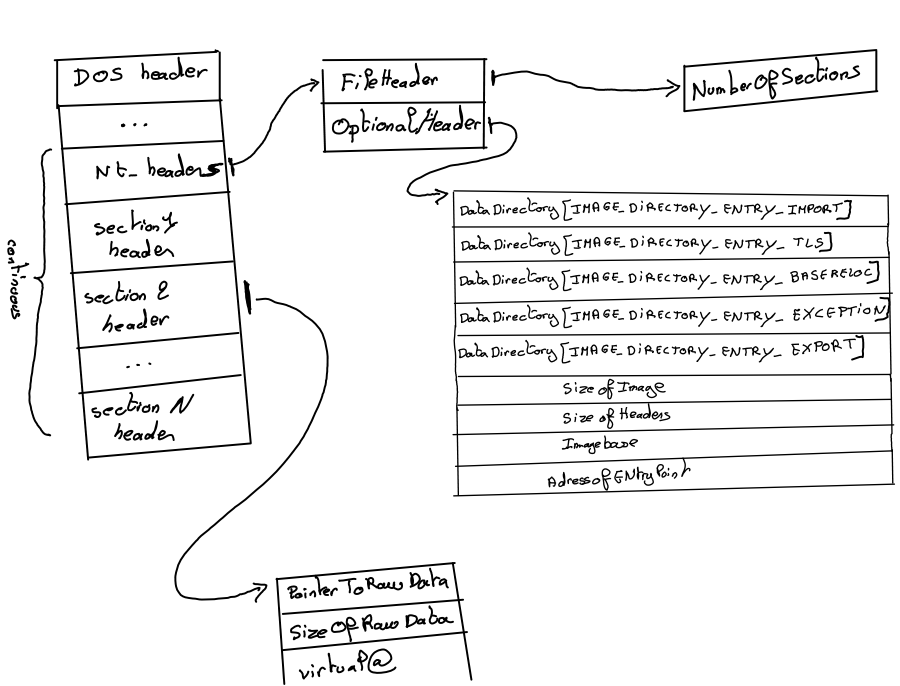
Each of these structures can be found in winnt.h.
In memory representations
As shown later, the first stage of a PE loader is to load the image of the executable. An image is a representation of the PE file in memory, where the sections are arranged as expected. Thus, an image has a different structure than the PE file itself.
For the rest of this article, I will assume that the entire PE file is loaded into memory at address @FILEMEM.
At a high level, a loader begins by allocating memory at a given address @BASE to store the image, copying the headers to @BASE, and then copying the sections in a manner that I will describe later.
